Online store with commerce 2.X Drupal 8
Nowadays the e-commerce is growing quickly, a lot of companies are betting to sell their products online and the reason is simple: we are in the "Digital Age" everybody wants to buy stuff from the comfort of their homes.
With the module commerce of Drupal 8 we can build our online store “easily”. On this article I’m going to explain the essential concepts of the module and cover how to setup our store and all the necessary configuration to sell our products: I’ll use computers and printers in this example.
Concepts
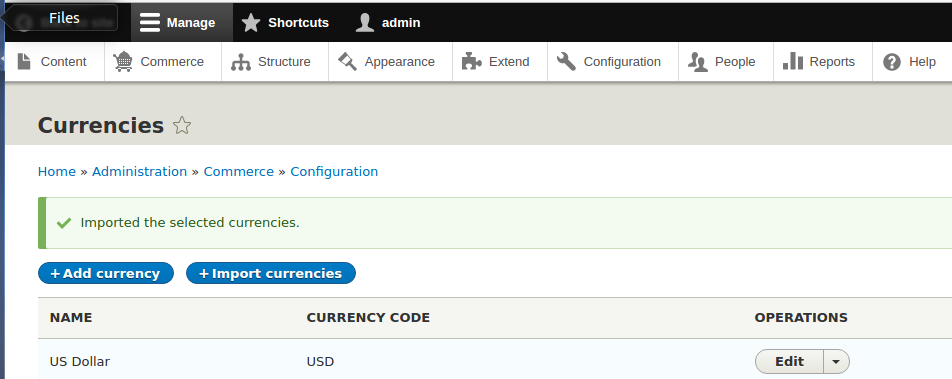
Currency: The first thing that we need to do is to configure our currency. We can create the currency or import one. To import go to /admin/commerce/config/currency and select import:

Then just select a country then import and done we have the currency for our store.
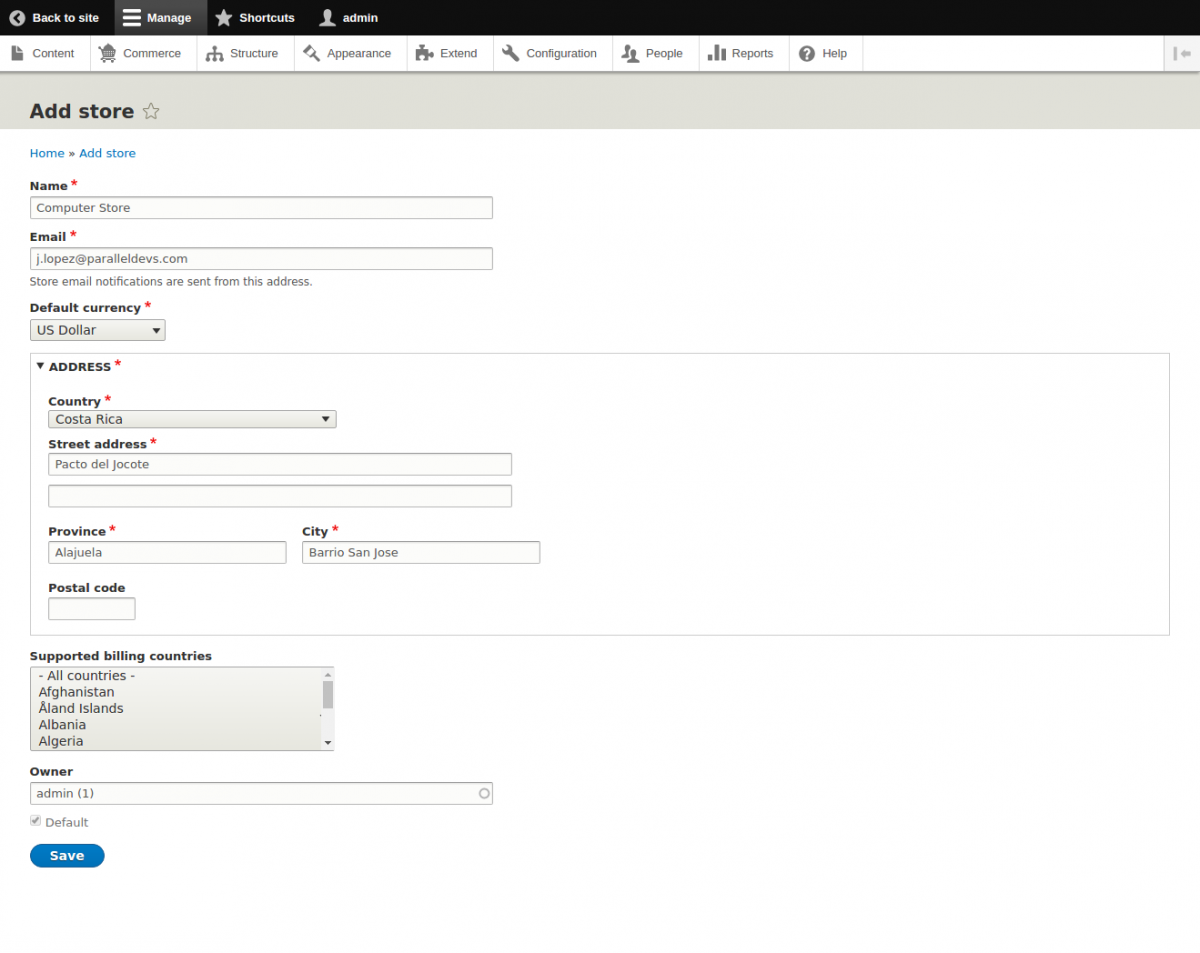
Store: We can create one or multiple stores with different configurations for products, taxes, promotions, checkout, workflow. To configure the store we need a name, email, currency(previously created) and some more settings. The example is shown below:
Products:
It's what you want to sell in your online store, you can have one or more and each one can have their own attributes.
For this example we will have 2 product types:
-
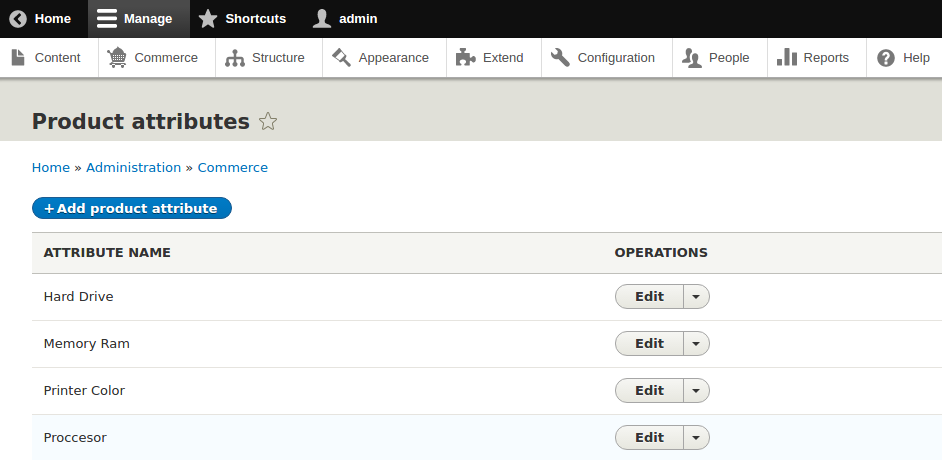
Computers: Attributes: Hard Drive, Memory Ram, Processor.
-
Printers: Attribute: Color
To set the attributes go to admin/commerce/product-attributes and click on add product attribute
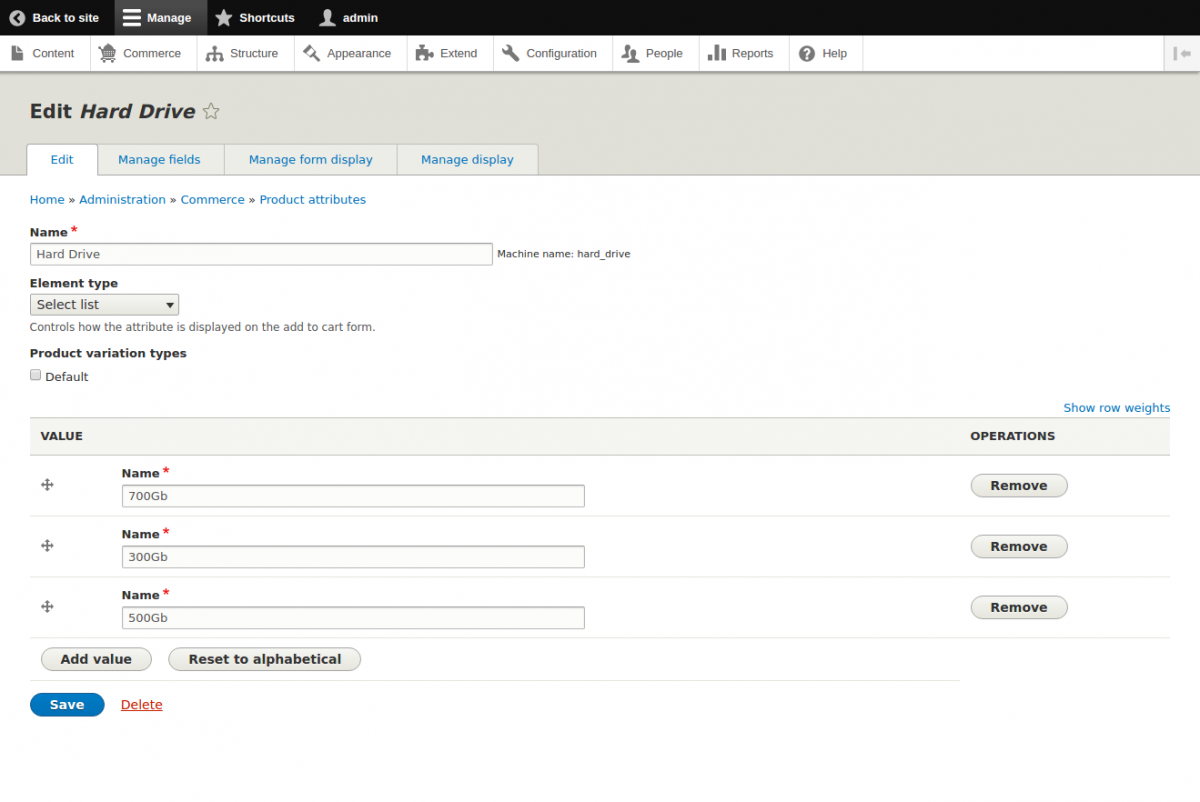
We filled the name and values of the attributes in this case of the hard drive. It’s the same process for all attributes. At the end we will have all of our attributes ready.
Product variation type.
By default, we have one variation type we can use or create more. For this example, we are not going to use the default we will create one for computers and other for printers, and then we will assign the attributes to each product variation. When the products are created we can create one or more variation of the same products.

Here we have our product variation type for computer:
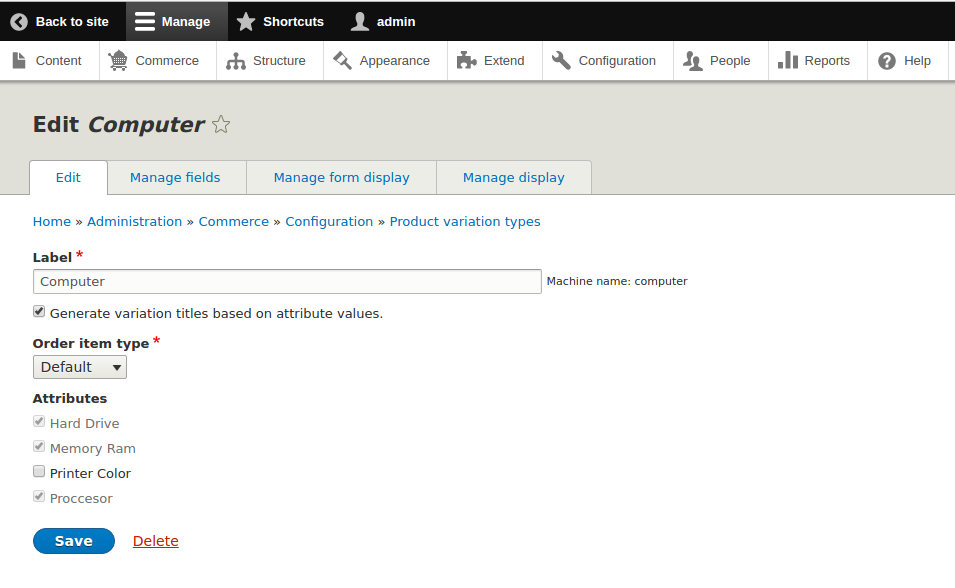
To add the product variation type of the printer is the same process.
Product Types
Then we need to define our products types, here we set the variation type previously created. One product type can have just one product variation type for that reason we will create two product types one for computers and another one for printers, also here we can create fields for the products in this case in each product type we will create one field to load the image of the product.
Adding the product type
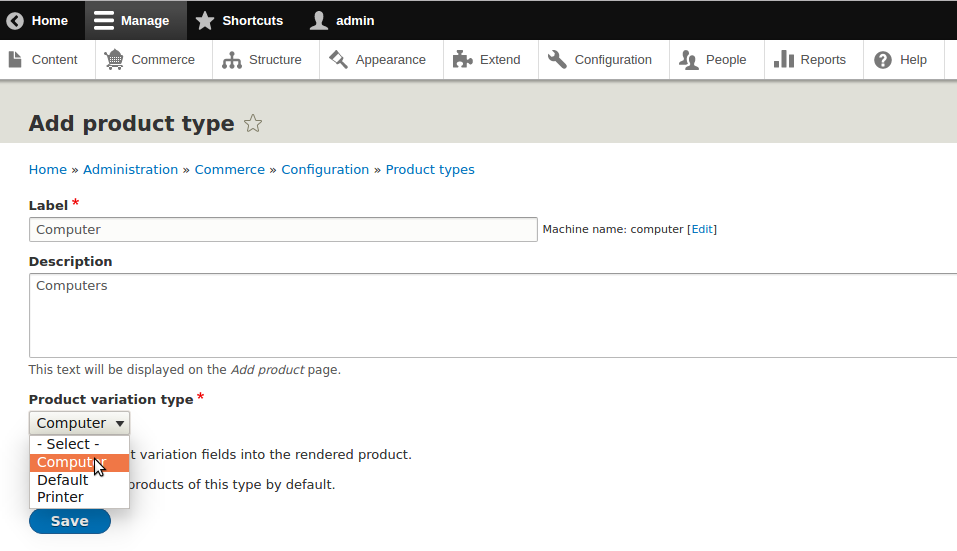
Then go to manage fields and create the field for the image
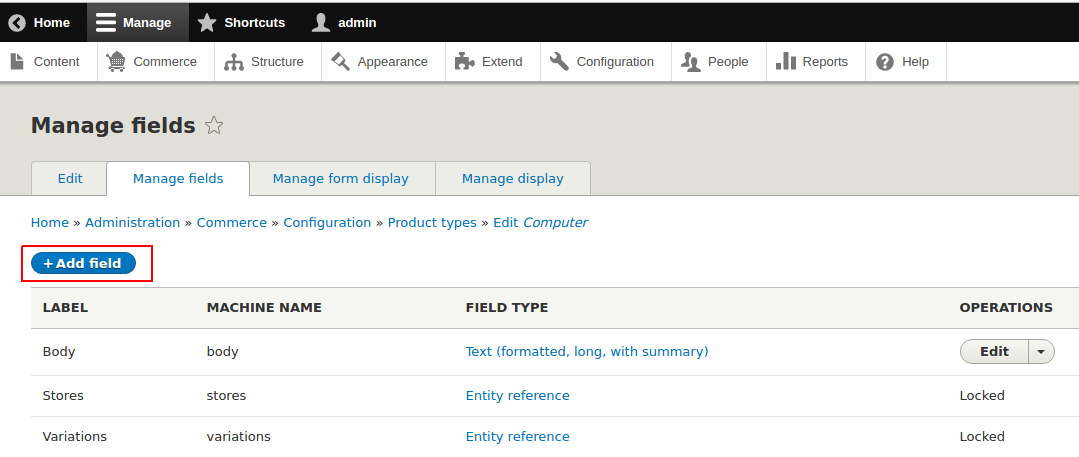
Now we are ready to create our products.
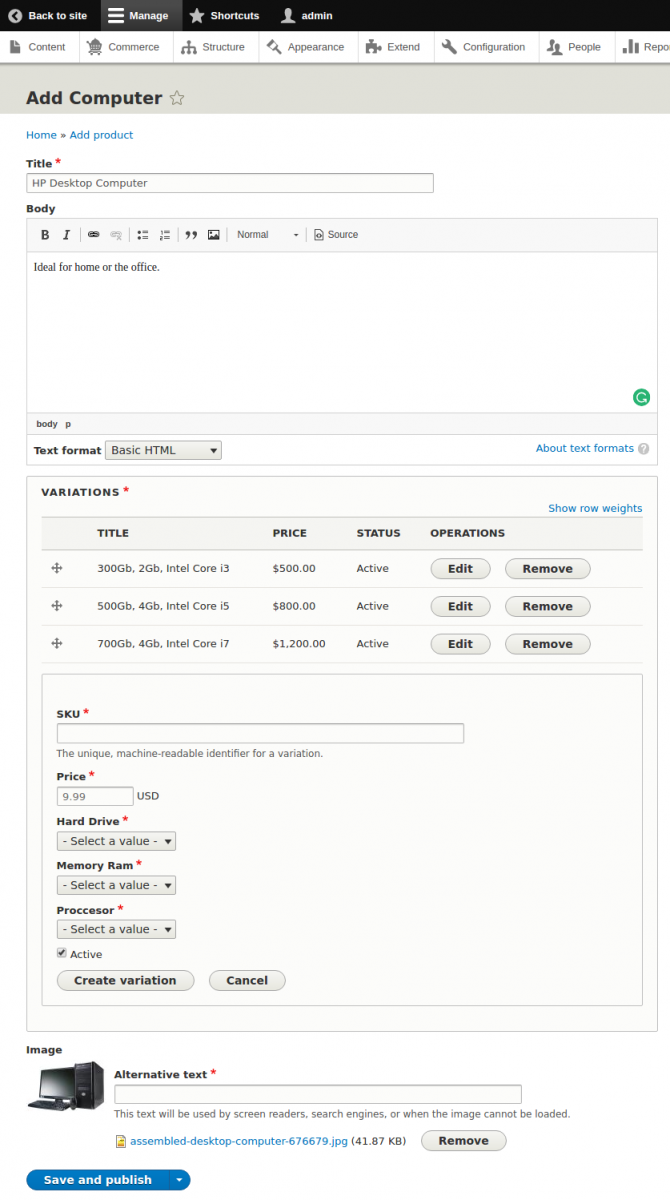
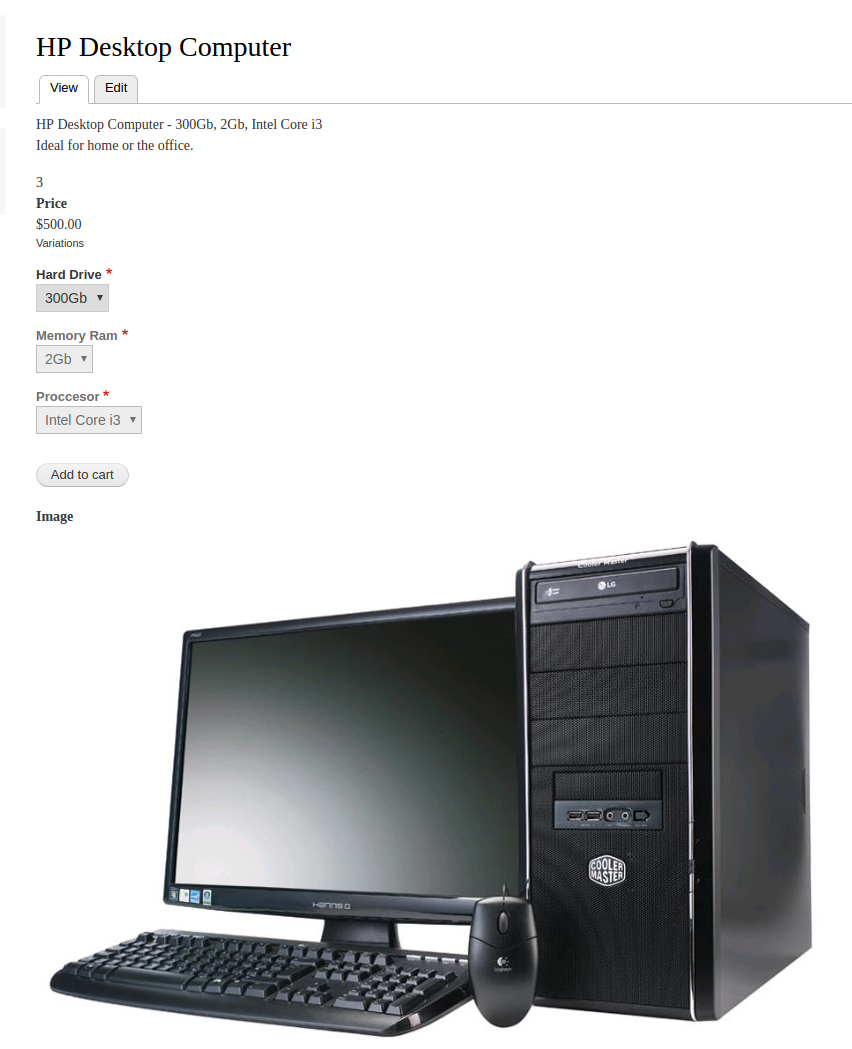
Pay attention to the variations created, the field sku is one ID for each variation and the field for the price is provided by default. Here we have the same computer with different variations. Now the people can buy this product with the desired characteristics.
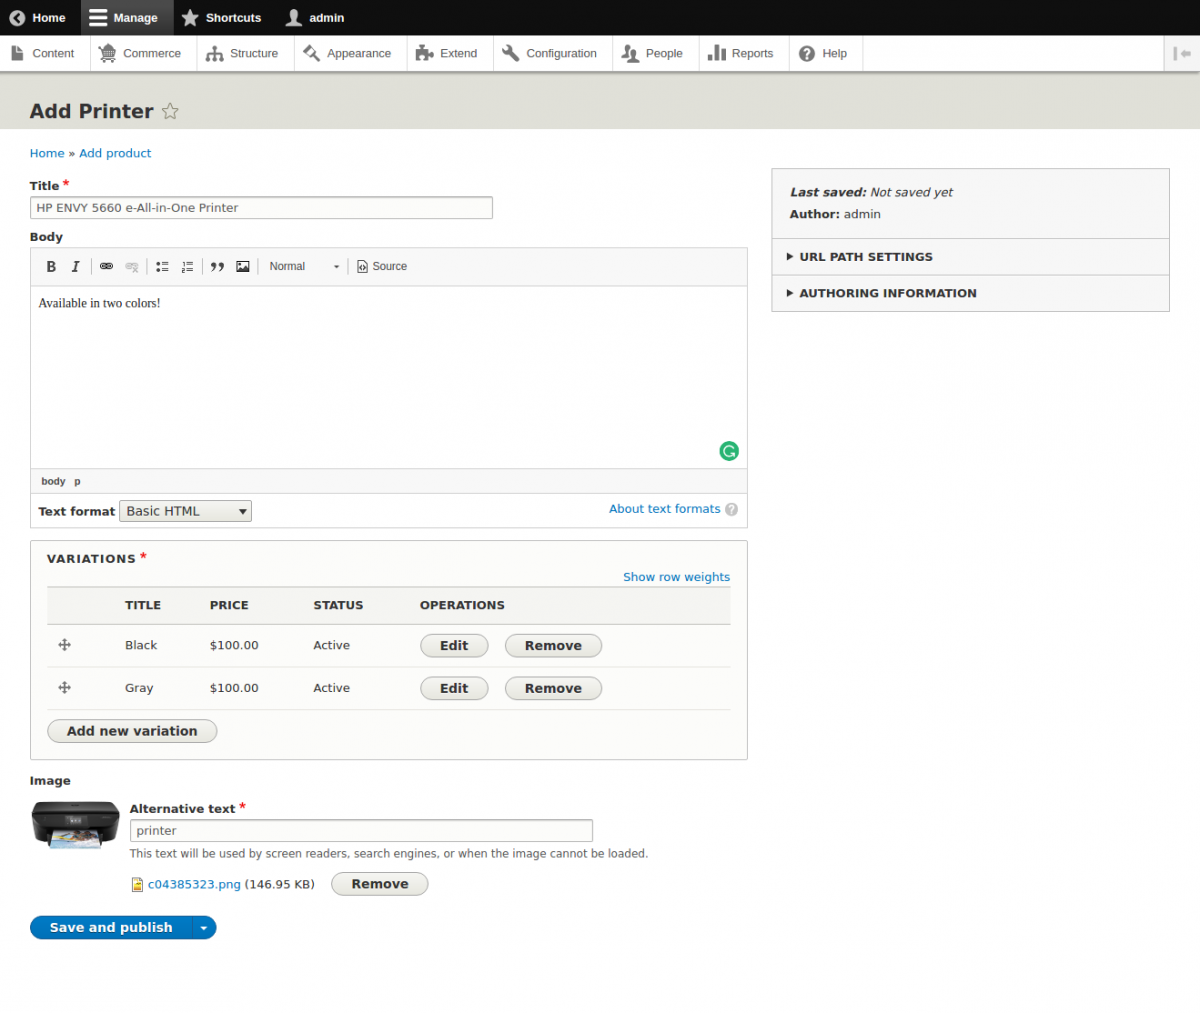
Now we will create a printer product
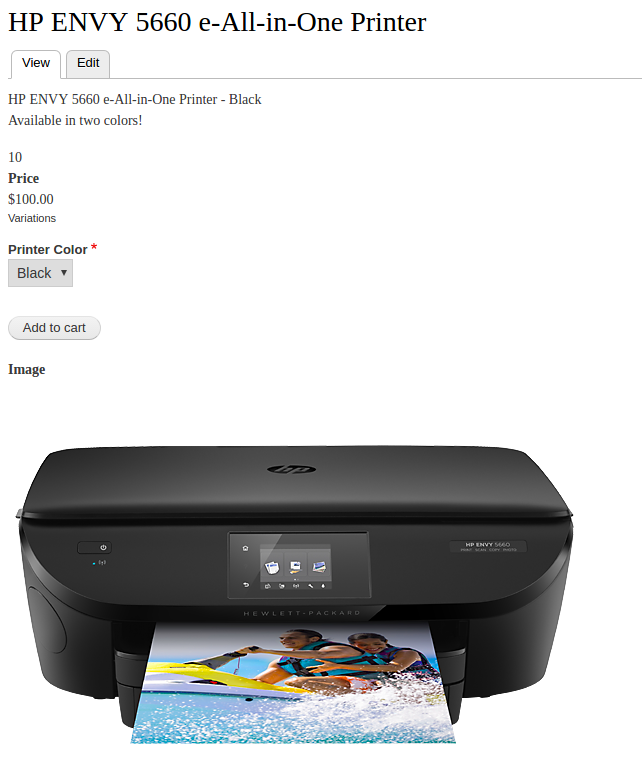
And now we have the printer ready to be sold.
Payment
We need to add a payment gateway this is the way that our customers will pay their products.
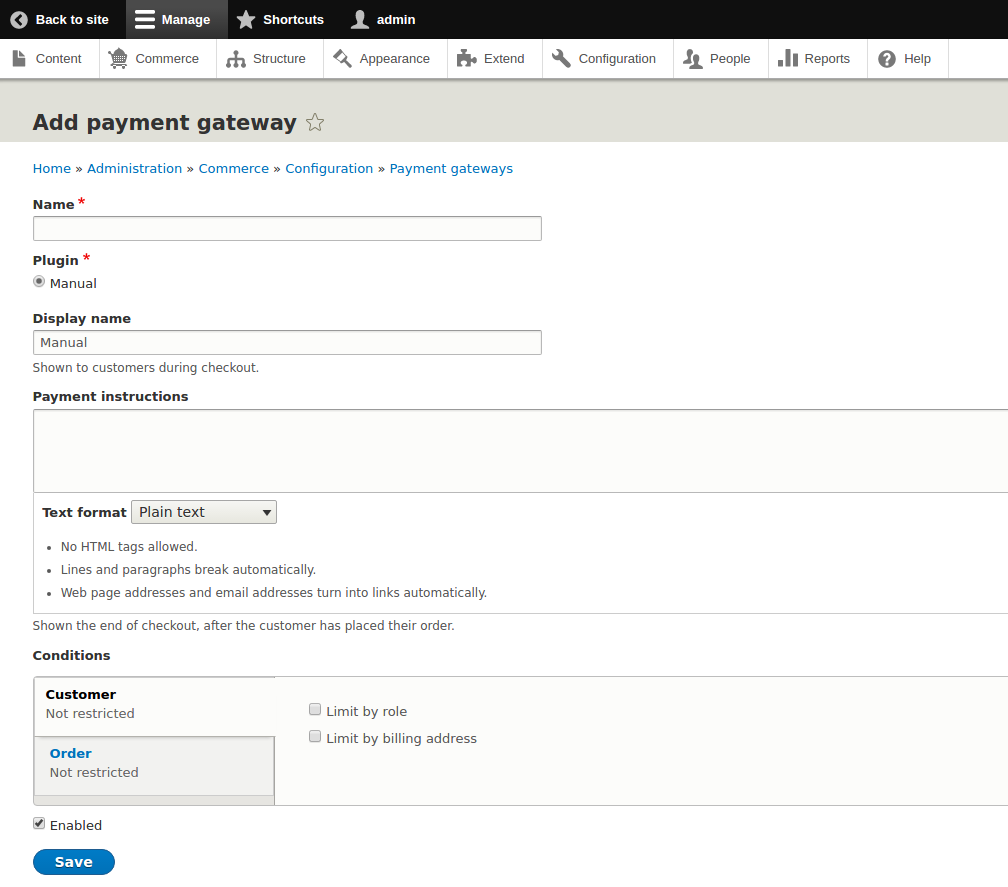
To create the payment gateway you can the use manual plugin or you can download some module to provide another plugin to process the payment. Some famous modules are:
- Commerce Braintree
- Commerce Paypal
- Commerce Auth.net
- Commerce Stripe
- Commerce PayUMoney
Order Types
Here we can set two of the important configurations for our online store: workflow, and checkout.
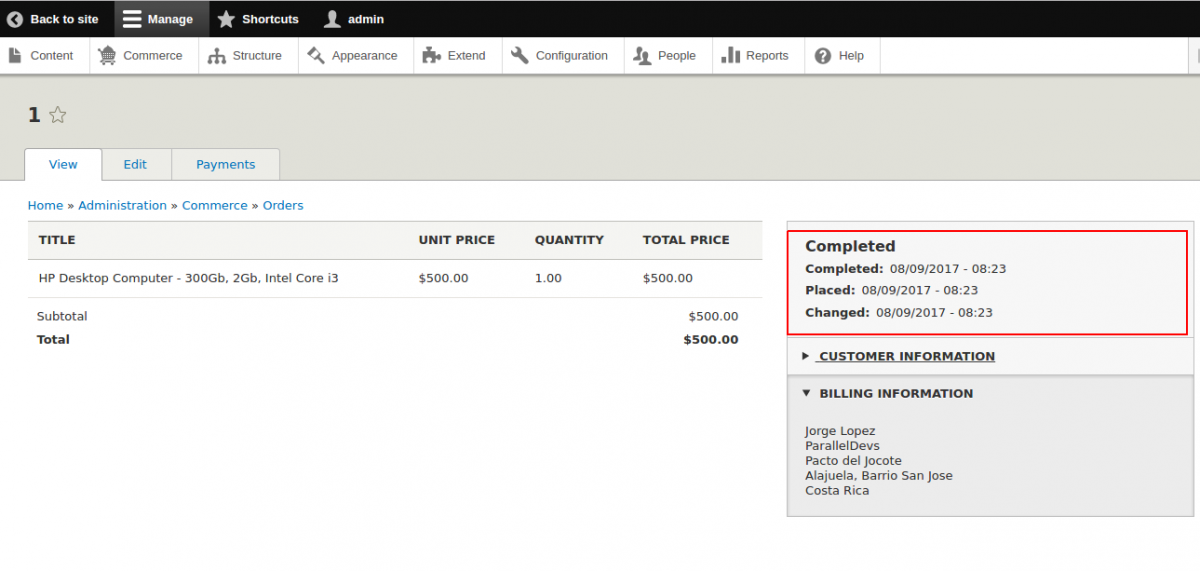
Workflow: Defines the states of the order we have two options with and without validation. If you select without validation the orders will have the status draft(when we are creating the order) and complete(When we finish the purchase) and if you select with validation the order will have one extra status(validation) before complete status and to change the status of the order to complete will be necessary approve by an admin user

Here we have and order without validation
Another one with validation
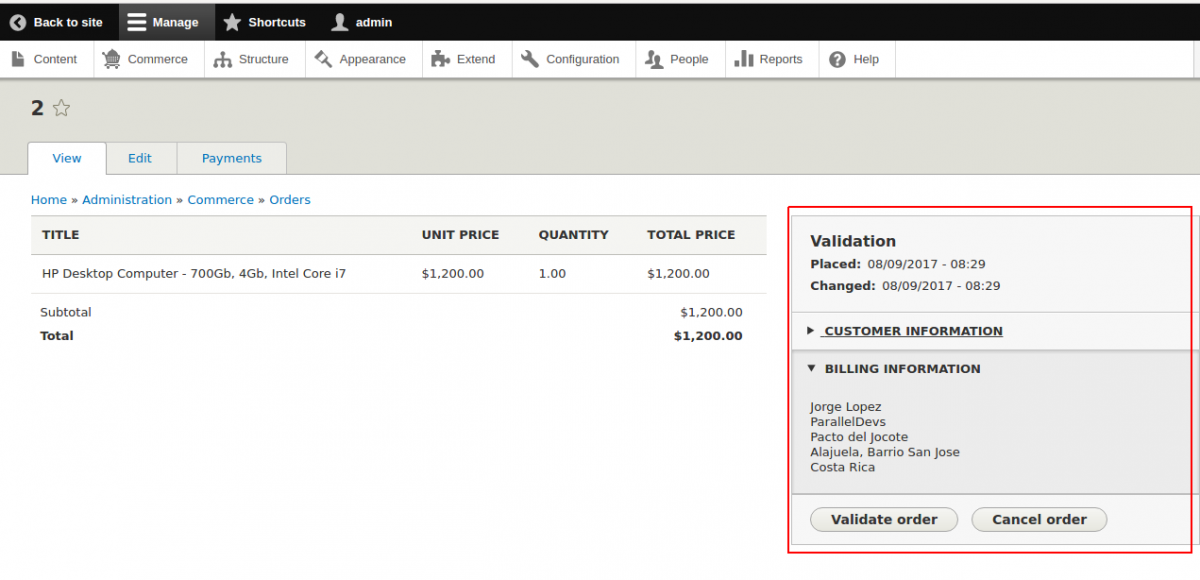
Checkout: Are the steps that you need to follow to buy your products starting from select the products to ending in the payment process. You can add a custom step if you want for this, but you’ll need to create a custom checkout. For this example, we will use the default checkout.
This should be the basic configuration for our online store.
Now we are ready to sell our products.
