Installing Apache Solr in Drupal 7
Apache Solr is a search application based on Apache Lucene, Solr is highly reliable, scalable and fault tolerant, providing distributed indexing, replication and load-balanced querying, automated failover and recovery, centralized configuration and more.
This blog shows you how to set up it on your localhost in order to execute search queries on your local environment because sometimes having it on the real server isn't enough, therefore we need to build the search for pages or other things that we can't do on the server. So I'll show you how to install it on Drupal 7.
A) Setting up Apache Solr locally.
1- First, we need to check the Java version because we need to have Java 6+, so we can check it:
java -version
2- We're going to download Apache Solr but I recommend you to download the 3.6.2 version because this is a version with the best compatibility with our Drupal version. You can download it on your root project or where ever you want.
To do so you can go to the Apache Solr page here:
http://archive.apache.org/dist/lucene/solr/ and looking on the old versions. But you can also download it using the following command:
curl -O http://archive.apache.org/dist/lucene/solr/3.6.2/apache-solr-3.6.2.tgz
3- Now we just need to decompress it:
tar xvzf apache-solr-3.6.2.tgz
4- In the folder, we have a pre-configured example so that is we're going to use as our Solr server, we need to go there:
cd apache-solr-3.6.2/example
5- Finally, we just need to run it:
java -jar start.jar
When it's running the console should look like this:

To check it you can go to http://localhost:8983/solr/ and it should show you the Apache Solr server page.
B) Setting up on your Drupal site.
1- Connecting Apache Solr with Drupal.
First, you need to install the search api and search api solr modules.
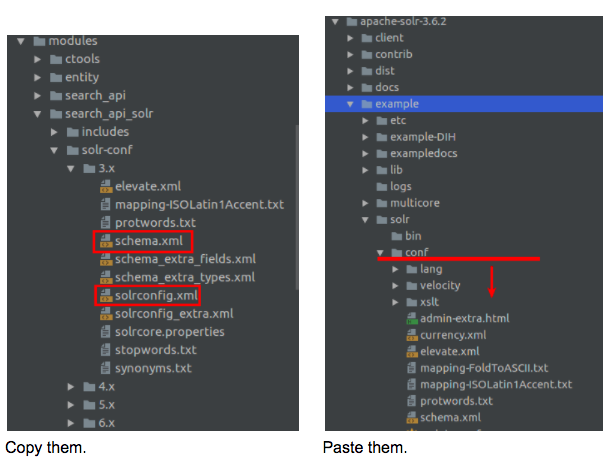
Now, look into the module search_api_solr the following files “schema.xml” and “solrconfig.xml”, then copy them to the folder with the server settings, for this specific example, it could be in “apache-solr-3.6.2/example/solr/conf/”.
2- Configuring the Drupal search.
If you have not yet enabled search_api and search_api_solr modules, then enable them and clear the cache. On the admin/config/search/search_api page you can create two entities - server and index, so let’s do this.
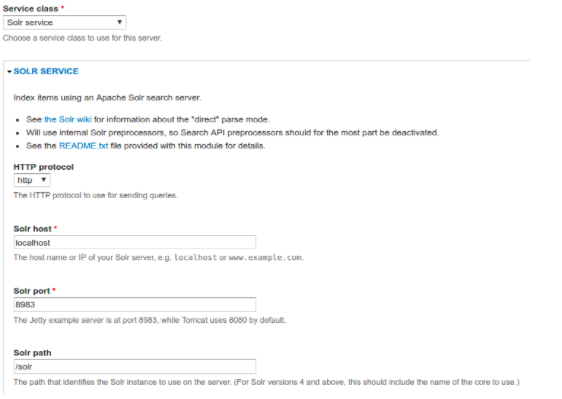
So to create the server go to admin/config/search/search_api/add_server. The class must be “Solr service”.
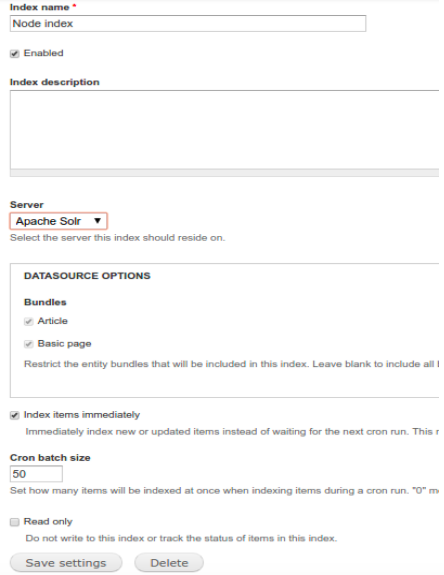
Now let’s create the index - admin/config/search/search_api/add_index. Call it Node index, select Solr server created before. Also, you have to choose the fields by which to search.
In this case, we’re going to create a view that allows us to display the search results. For this, you have to make sure that you have installed and enabled the search_api_views, views, views_ui and ctools modules. So the important thing here is showing the node index:
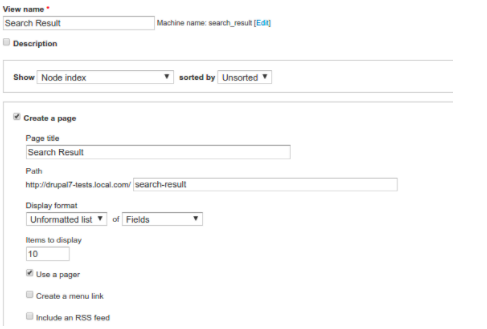
For that, we need to add the Title and Body fields for display. Then add the «Search: Fulltext search» filter and select the Title field in the filter settings. So the search will be performed by the Title field for this case. Also, we need to set the filter as exposed in order to be able to enter search arguments through the form.
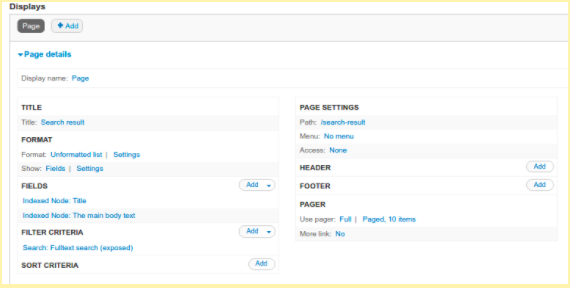
So when the view is saved, run the indexing of nodes if they aren't indexed, for that go to admin/config/search/search_api/index/node_index/status and click on "Index now".
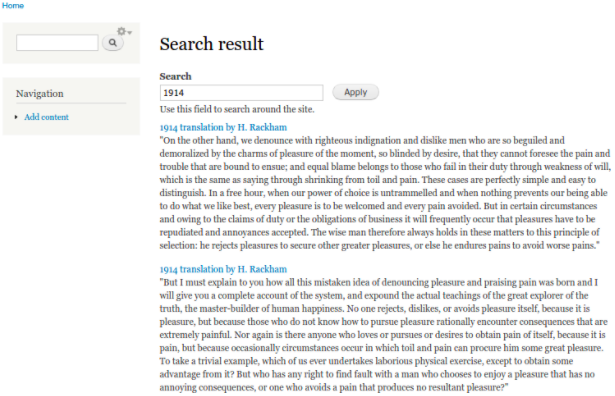
Now we can go to the search result page and specify a parameter to search.
Some references:
http://lucene.apache.org/solr/
https://drupalize.me/videos/install-apache-solr-localhost?p=2132
- WRITTEN BY:Mauricio Navarro
- POSTED ON:3/9/2018
- TAGS:Apache Solr
