How to create a Custom Views Serializer in Drupal 8 or 9
Why do you need a Custom Serializer format?
By creating a Custom Serializer, as I will show you in this post, you will be able to create custom JSON responses in your Drupal Rest Views.
Sometimes if you are developing a decouple web application you’d need to implement a custom D3 Chart, a Js Front End component or library that pulls the data from a Json file with a very specific formatting. This is when a custom serialized endpoint built using Drupal Views comes in handy.
What are Drupal Rest Views and when to use it?
Drupal Rest Views are a type View Display where you can set a URL to return a JSON or an XML response. This is useful when you need to expose Drupal data for your frontend application using a Javascript framework or for a mobile app.
So, in order to create a Custom Rest View you need to activate two modules that come with the core. Both of them are in the Web Services section.
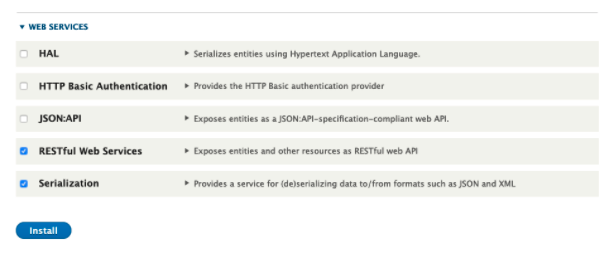
After activating those modules, you will be able to create a view using a view to export some data in a JSON response format.
Create a new view and set the field's values with something similar as in the next images and save the view. However, you can change those fields later in the view's configuration screen.
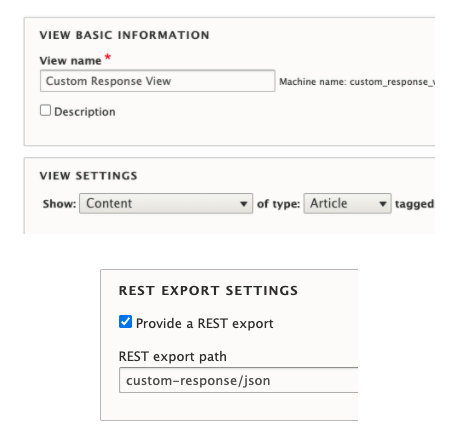
Next, in the view's configuration screen click on format and make sure that you have the "Serializer" option selected.
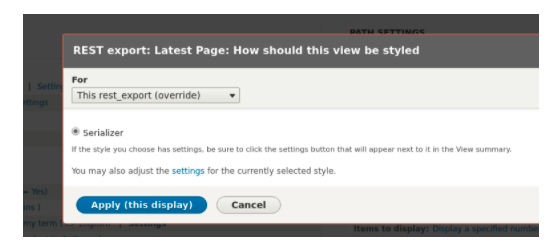
So, how do you create a custom serializer?
At the end of this post, you will have a custom option with the format you need. The first thing you have to do is create a custom module where you will code the plugin with the logic of the new serializer option.
To do that, just create a folder under modules/custom to store all the custom modules you will have in your project, then, create a folder to save the files of your custom module with the correct naming convention (using lowercase and underscores instead of spaces) for example: my_custom_module.
To continue, create the src folder where the files related to the custom module will be located. In this case, you will create a Plugin. Hence, create the following file structure: src/Plugin/views/style/CustomSerializer.php.
As you can see, we created the file "CustomSerializer.php. This file will have the logic of the custom serializer, and it is just a PHP Class that extends from the Serializer core module and will override the render method for the view that you created before.
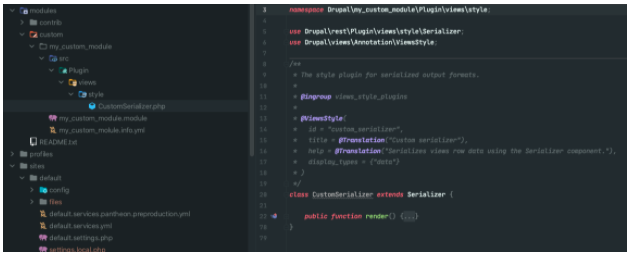
At this point, I strongly recommend you to check the file structure to be sure that the Plugin folder is under the src folder and the comments before the class declaration. The comments have some important information about what you are doing, such as the id, the title, and the help of the serializer you are creating. This will help you to recognize your serializer in the CMS.
Now, we will code some logic to change the JSON response format in the render method. With $this->view->result you can get all the results from your view, so you can walk through them with a foreach to alter the format. In this case, I have the structure of the JSON I need in a previously formatted associative array.
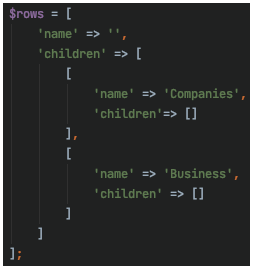
After that, as I go through the view's result, I will fill the arrays inside the parent array with the information I need.
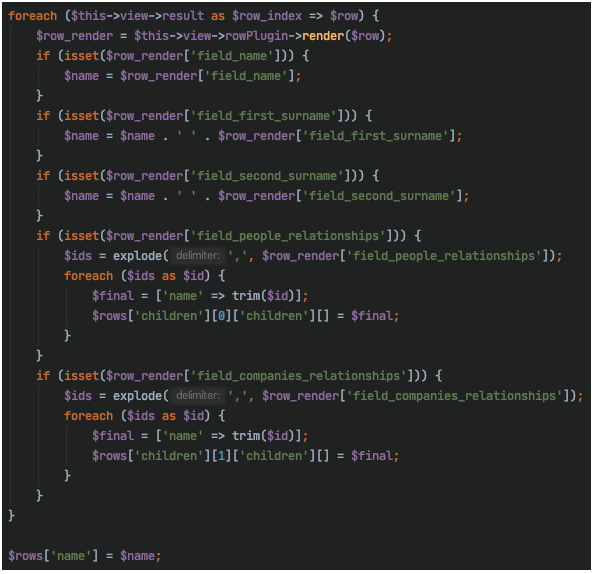
In this case, you can see that for every result I get, I check all the fields to send them to the correct array in the parent array. For some fields, I need to add an extra logic to get only the parts I want. At the end, just add these lines with your information to return your new json.

As a Drupal developer, if you think that it is a good time to clear the caché, you are right! Do it and go back to your view's configuration screen. Now, if you click on "format" you should see the new option with the name you set.
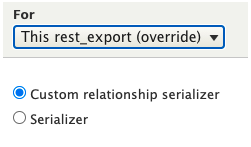
Now, to check if your results are returning the way you wanted you can go on your browser to your site's URL /the_path_you_set (in my example: custom-response/json) and check the result. For a better formatted result, you can use postman.
Bonus
How to add a parameter in the URL to create a filter?
To do that, in the view's configuration screen click on the add option in the filter criteria section. Select the field you want to use to filter the results and set the following fields with the information you want. In this example, I will use the id.
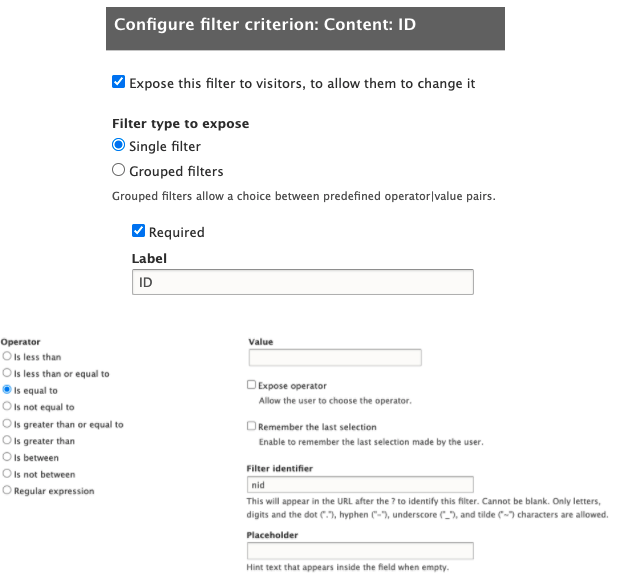
The "filter identifier" is the parameter you will send in the URL to filter the results. Like I am doing it in the next image.

And this gives me the next result:

Conclusion
Knowing how to create a Rest View with a custom serializer will help you to easily export data from your site to another application without configuring custom modules with routes and a lot of code.This will give you the advantage of being able to return custom responses in any format you want.
- WRITTEN BY:Byron Rivera
- POSTED ON:5/6/2021
- TAGS:Drupal 8 Drupal Drupal Views Drupal End point Drupal API
